Private WoW Server Guide: How to Make a WoD Server for Video Capture
I am a paying Blizzard subscriber for multiple accounts and I love the game so much, I wanted to do even more to get more epic machinima screen captures and camera angles. However, there was a problem on live servers! Many times there were long queues for pvp and sometimes the queue never popped, or required forming a group which can take a long time and is never guaranteed. Thus I had to find a way to get the WoW footage I need for machinima content creation for YouTube and live streaming. I was able to solve this problem (and so many more) using a personal private server.
I offer more links and information for my website members and Twitch subscribers here: http://www.psynapticmedia.com/members/private-wow-server-wod/
Subscribe to Psynaps YouTube Watch Psynaps Live on Twitch
How to Make a Windows Server
1.) First you have to download all files from the forums.
All the downloads are here:
http://www.ac-web.org/forums/showthread.php?207766-6-x-x-World-of-the-Damned-Grommash-Vengeance
Download the Repack 32 Release : https://www.lordcraft.net/index.php/files/file/205-grommash-vengeance-core/
Note: you must register on the forums
Here are direct links to the downloads you need:
https://www.lordcraft.net/index.php/files/file/198-grommash-vengeance-maps/
https://www.lordcraft.net/index.php/files/file/197-grommash-vengeance-dbc/
https://www.lordcraft.net/index.php/files/file/203-grommash-vengeance-vmaps/
https://www.lordcraft.net/index.php/files/file/207-grommash-vengeance-server/
https://www.lordcraft.net/index.php/files/file/204-grommash-vengeance-mmaps/
https://mega.co.nz/#!4NNV1CyY!w5piNpksUt8IsY_Ca0o-ehvGX57OrDAjGmnCIy_VqBI
2.) Extract all the files in one place, be sure to extract the DBC, Maps, vMaps, and mMaps where the worldserver.exe and bnetserver.exe exists.
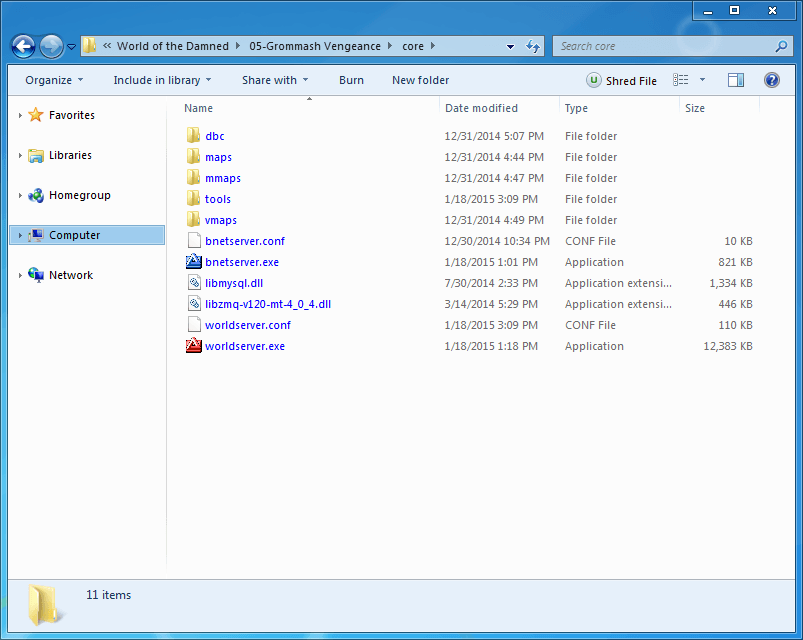
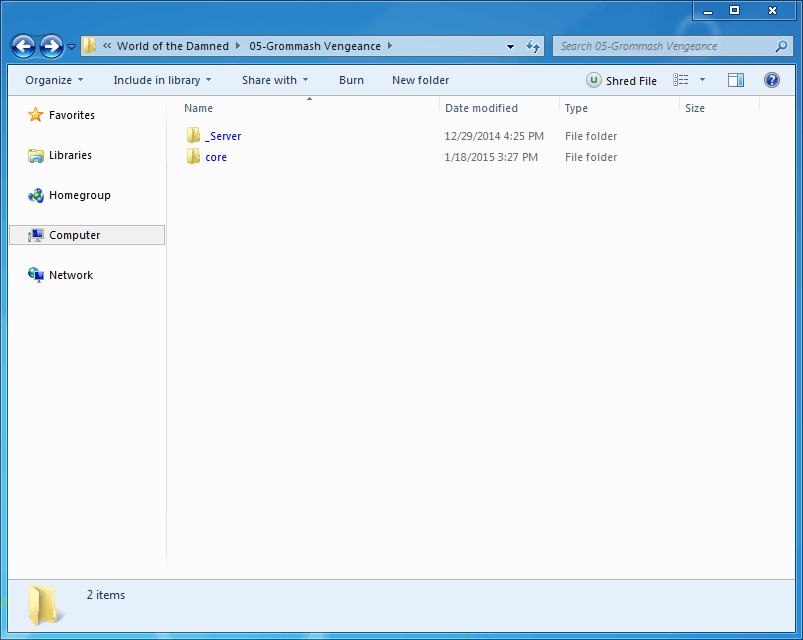
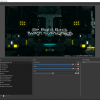
3.) After extractions are done, arrange your folders and files so it looks like the following.
4.) Start the following programs in this order. There should be no errors, but if you get any errors see the note below.
MySQL.bat
bnetserver.exe
worldserver.exe
Troubleshooting Notes
– Copy these to the core folder (found in DLLs folder, use the newest ones). You can find and copy more if you see them in an error message.
libeay32.dll
libmysql.dll
libzmq-v120-mt-4_0_4.dll
ssleay32.dll
vsinit.dll
– in the “\core\dbc\enUS” folder, copy all the files and paste them in “Server\core\dbc” folder. This fixed problems for me, it not be needed for you.
– If you still have problems starting worldserver.exe, open the the “Server\core\worldserver.conf” and try setting it to have the absolute location of the .exe (hopefully you dont need to do this). Your path may be different from mine, but I used: DataDir = “S:/wow_private_server/Server/core”
5.) Optional (but suggested). Then make a copy of your working “live” World of Warcraft folder. We will use the copy so we dont alter any files in our live folder.
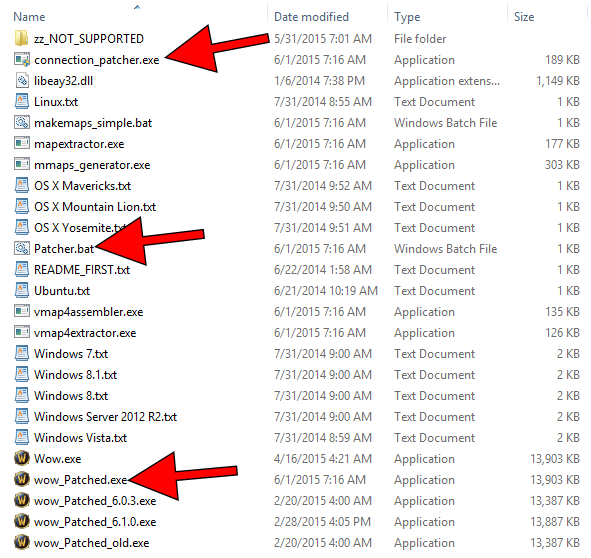
6.) In the tools folder you downloaded from the forums, copy wow_Patched.exe, Patcher.bat, and connection_patcher.exe to the new WoW folder.
4.) Run the run the Patcher.bat in the new wow folder (run as Administrator). If you get any .dll errors, find the dlls in the core folder and copy them in the wow folder.
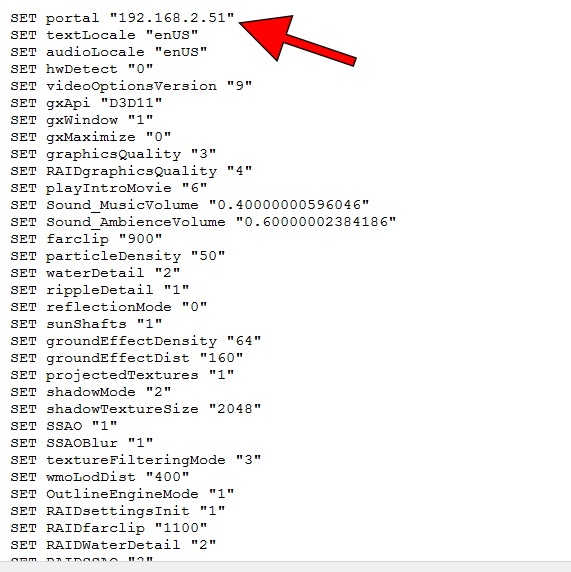
5.) Open the WTF/Config.wtf file, change the SET portal “enUS” to 127.0.0.1 (Note in the picture 192.168.2.51 is not the correct IP, use 127.0.0.1).
SET portal “127.0.0.1”
6.) Login
- Username: admin@admin
- Password: admin
How to make a Linux Server
This is your guide for this process: http://collab.kpsn.org/display/tc/Core+Installation
sudo apt-get install build-essential autoconf libtool gcc g++ make cmake git-core wget p7zip-full libncurses5-dev zlib1g-dev libbz2-dev
sudo apt-get install openssl libssl-dev mysql-server mysql-client libmysqlclient-dev libmysql++-dev libreadline6-dev
sudo apt-get install libboost-dev libboost-thread-dev libboost-system-dev libboost-filesystem-dev libboost-program-options-dev libboost-iostreams-dev
sudo apt-get install libzmq-dev
# note username and password are the same for the following required user accounts
sudo adduser trinity
sudo adduser wow
cd ~/
git clone -b 6.x git://github.com/TrinityCore/TrinityCore.git
cd TrinityCore
mkdir build
cd build
cmake ../ -DCMAKE_INSTALL_PREFIX=/home/wow/server -DCONF_DIR=/home/wow/server/etc -DLIBSDIR=/home/wow/server/lib -DTOOLS=1 -DWITH_WARNINGS=1
# note “-j 2” below means make with 2 CPU cores. if you dont have multiple cpus, just use sudo make
sudo make -j 2
sudo make install
#install mySQL
sudo apt-get install mysql-server libapache2-mod-auth-mysql php5-mysql
sudo mysql_install_db
sudo /usr/bin/mysql_secure_installation
MOST IMPORTANT STUFF (database). You can get more info here: http://collab.kpsn.org/display/tc/Databases+Installation
Important database Download files: http://www.trinitycore.org/f/files/category/1-database/
Before doing anything to the dadabase, open up heidiSQL and run these:
1 Create the three databases by importing …\sql\create\create_mysql.sql. You now have three databases – auth, characters, and world. You may need to refresh your program in order to see the new databases.
2 Click on the “auth” database and import the auth database structure by importing …\sql\base\auth_database.sql. NOTE: these are in the files you downloaded.
3 Click on the “characters” database and import the characters database structure by importing …\sql\base\character_database.sql.
4 Click on the “world” database and import the world database structure by extracting and importing the “TDB_full_*.sql” file you downloaded from the Database download section.
5 Click on the “Hotfixes” database and import the hotfixes database structure by extracting and importing the “TDB_hotfixes_*.sql” file you downloaded from the Database download section. ( it was in the same 7z file as the “TDB_full_*.sql”)
6 Click on the “world” database and import any *.sql file available in your …\sql\updates\world folder THIS IS MANDATORY or your core very likely will fail to start.
7 Click on the “hotfixes” database and import any *.sql file available in your …\sql\updates\hotfixes folder THIS IS MANDATORY or your core very likely will fail to start.
NOTICE WE NEVER IMPORT sql\updates\auth or sql\updates\character files on fresh installation, those files are for update trinitycore not for fresh install.
NEVER ENABLE CONTINUE ON ERROR ON YOUR SQL CLIENT
NOTE: for the updates, I had to combine all the SQL files in the specified update folder (eg world updates, hotfixes updates). This command will merge them all:
cat *.sql > out.sql
The resulting out.sql will be the merged hotfixes.
Create a new directory named “data” in /home/wow/server
Upload maps into data directory (I got these maps online, from the windows repack downloads. See windows downloads):
dbc
maps
mmaps
vmaps
To run the server:
cd /home/<user>/server/bin/
./bnetserver
./worldserver


Hello, I followed all of your instructions, but when it came down to launching the bnetserver and the worldserver it gave me an error. But it didn’t tell me what I was missing, anything you can do to help?
The 6th link does not work:
https://mega.co.nz/#!4NNV1CyY!w5piNpksUt8IsY_Ca0o-ehvGX57OrDAjGmnCIy_VqBI
How can I get this file?